Strawberry Chocolate Popsicles, dairy free.
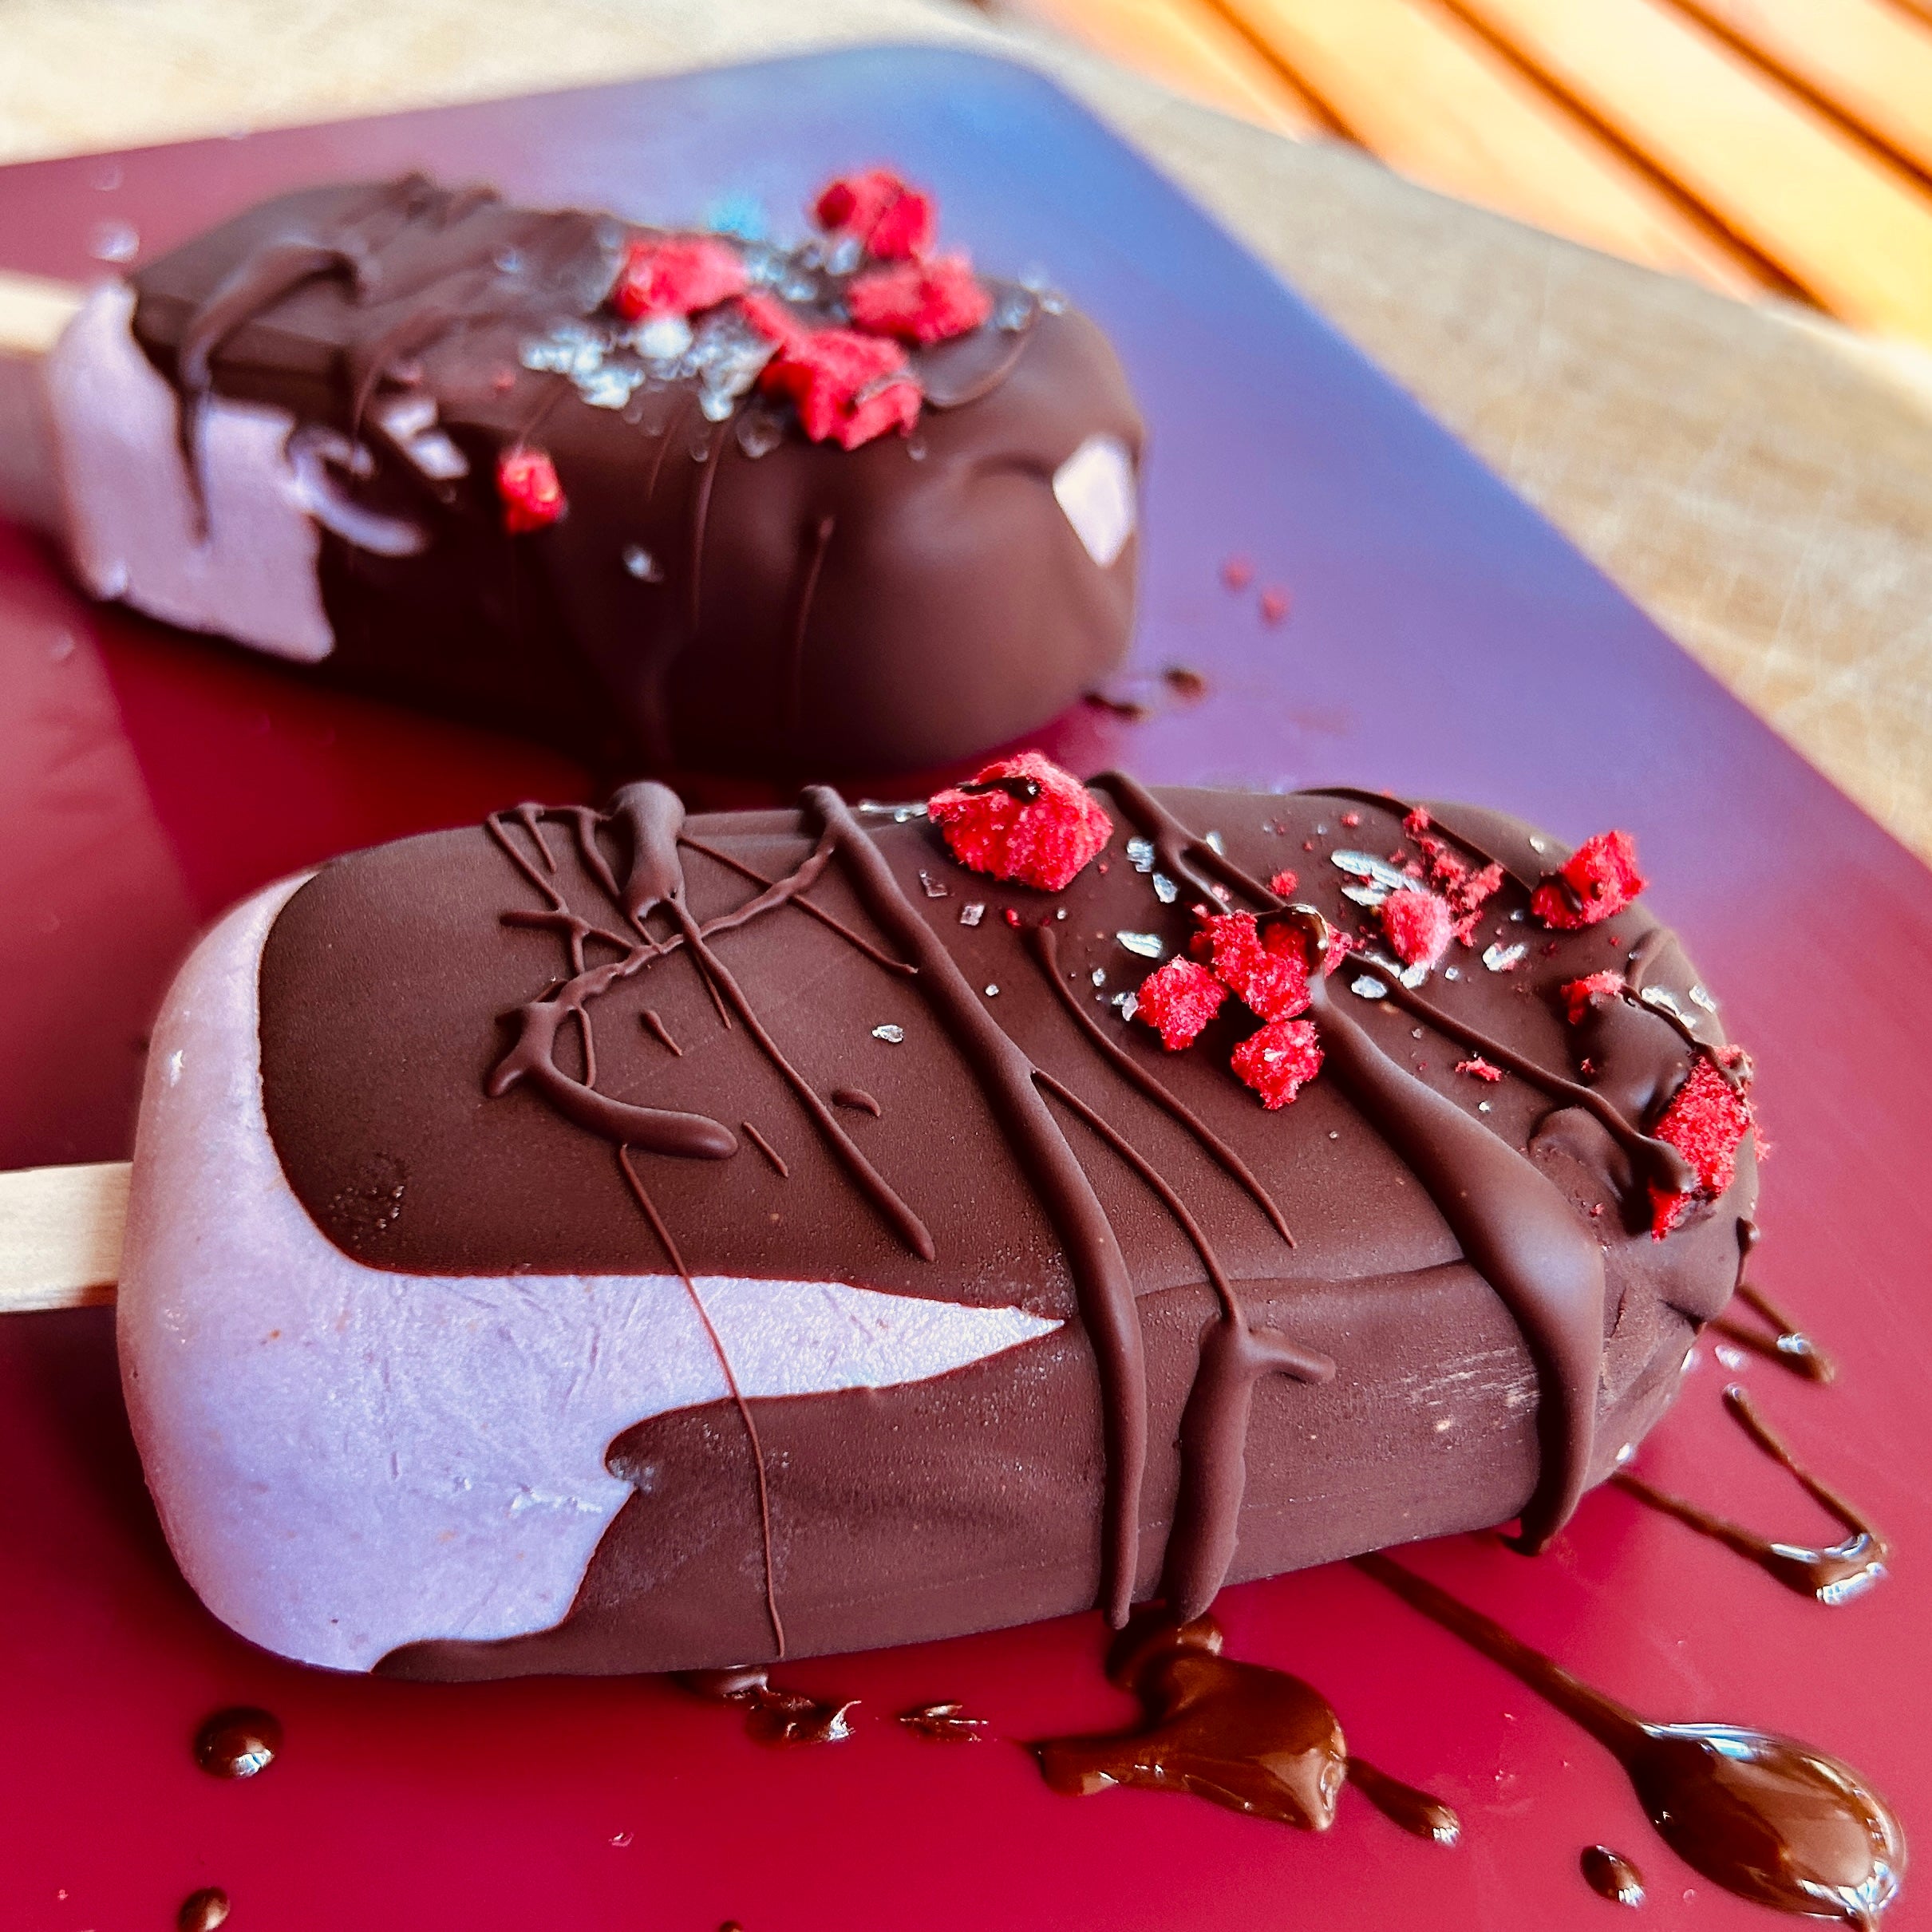
These popsicles are so delicious, and adaptable. They were a journey to figure out, but once I did, and it all made sense, they come together so quickly. They don't actually need the chocolate layer, which is thin crunchy and oh so delicious, but, not necessary. There's a sprinkle of freeze-dried strawberries, and a bit of flaked sea salt for a final, but also not necessary touch.
They are made with our cashews, coconut cream, strawberries, and honey, or your sweetener of choice. I love the flavour of honey with strawberries and in my ice-cream world have found it to be the most harmonious with them. If you switch out the honey for another sweetener they are the perfect vegan dessert.
It could also likely be made and put in a parchment lined loaf pan to make a sort of semifreddo. There's a whole load of options for some delicious desserts waiting for you.
NOTE: If you are using our cashews, they are soft enough that you do not really need to pre-soak them, but you can if that's how you roll. Make sure you rinse them well.
Equipment needed
Use a silicone popsicle mold to easily remove them
A blender is needed for the strawberry mixture.
Silicone baking sheet to place the chocolate covered popsicles onto.
Makes about 4 popsicles (depends on the size of your mold)
Ingredients
Strawberry Mixture
- 1/4 cup coconut cream
- 1/2 cup cashew pieces 70 grams, soaked for 2 hours if needed.
- 1 cup strawberries 145 grams about 10 medium sized strawberries
- 1/4 cup honey
Chocolate Layer
- 3/4 cup chocolate chips about 150 grams
- 2 tsp coconut oil
Garnish – Optional
- Freeze-dried strawberries
- Flaked sea salt
Directions
- Place all of the strawberry mixture ingredients in a blender
•1/4 cup coconut cream • 1/2 cup cashew pieces 70 grams • 1 cup strawberries 145 grams about 10 medium sized strawberries •1/4 cup honey - Blend until homogenized, it should be fully smooth. Scrape the mixture into your mold and pop into your freezer until fully set, about 5 - 6 hours. If using flexible silicone molds, place them on a firm, even surface, then slide them into your freezer. I used a small baking sheet.
- Once fully set, make your chocolate layer by placing the ingredients in a double boiler until just melted.
•3/4 cup chocolate chips about 150 grams • 2 tsp coconut oil - Take the popsicles out of the freezer. Pop the popsicles out of their molds. Use a spatula to scoop chocolate onto it, then while holding the popsicle stick lightly put a thin layer of chocolate onto the popsicle.
- If using garnish, quickly add them before the chocolate hardens, then place the popsicles onto the silicone sheet. I put the chocolate on the back side first, and then flip, put chocolate, quickly add garnish and then rest onto the sheet.
- Drizzle some chocolate across the popsicles. Place the tray back in the freezer until fully firm again.
- Once firm, you can put the popsicles into a tupperware container in the freezer until ready to eat.
- If you have left-over melted chocolate, you can always make this delicious chocolate cashew mylk-shake.